This Rainbow Clay post is from our contributor Emma of Adventures of Adam
We have recently fallen in love with DIY clay. It is so easy to make and is self drying too. As I seem to burn salt dough, anything that does not require to go in an oven is a winner in my books! Whilst experimenting with the DIY clay, I wondered if it was possible to create homemade clay disks as my three year old is forever stacking things on top of each other. I wanted an activity that would develop his fine motor skills whilst helping him learn the colours of the rainbow. We created Rainbow Clay Stackers.

Resources needed to make Rainbow Clay Stackers
* Cornflour
* PVA glue
* Rolling pin
* Milk carton lid
* Baking tray lined with baking paper
* Acrylic paint
* Mod Podge glue
How to make Rainbow Clay Stackers
Mix together 1 cup of cornflour with 1/2 cup of PVA glue in a large bowl. Once the two ingredients are combined, knead the clay until it is no longer sticky.

Sprinkle additional cornflour onto a work surface and roll the clay flat.
Firmly press a milk carton lid down into the clay. Twist the lid several times to make an indentation. Remove the clay from the lid and place the disk onto a baking tray lined with baking paper.

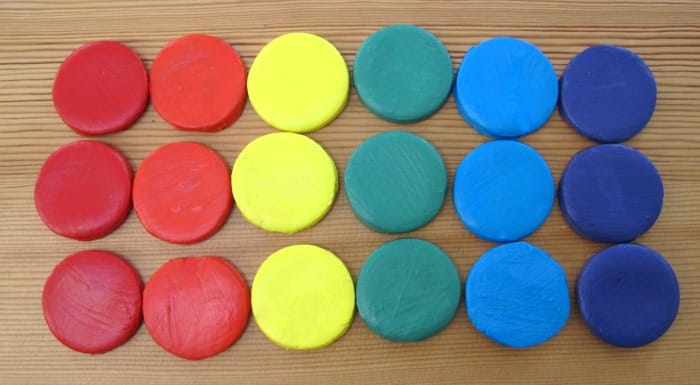
Repeat step 3 until you have several clay disks. We created 18 disks in total so we could make 3 rainbows.
Leave the disks to dry out overnight.
Paint the disks with acrylic paint. We painted ours red, orange, yellow, green, blue and purple. Allow time for the paint to dry.
Repeat step 6. Each disk required a minimum of two coats of acrylic paint on both side.
To protect the paint work from knocks and scratches add a layer of Mod Podge glue.
At first we laid out the rainbow clay disks in colour order on the table. We discussed the colours, their order and when we see a rainbow in the sky.
I then demonstrated how to create a Rainbow Clay Stacker. I placed the clay disks on top of each other in the correct colour order. My son managed to create all three rainbows. The activity made him concentrate on placing the coloured disk carefully. Obviously as soon as the three rainbows had been made he had to knock them down again.

I then challenged him to use all 18 clay disks to create one giant Rainbow Stacker. With perseverance he managed to complete the huge rainbow.
My three year old niece joined in with the fun. After completing the three stacking rainbows she wanted to explore the clay disks. She formed her own arched rainbow.

The cousins spent ages exploring different ways to stack the rainbow clay disks. Despite being knocked about, the clay disks retained their shape and colour. We shall be putting them into a busy bag to be used time and time again.

More Rainbow Activities
If you and your child love rainbows, you might like these fun ideas too!
Pot of Gold Rainbow Shaker for Sensory Play
Sensory Play : Rainbow Tactile Sensory Bin
The Ultimate List of Rainbow Sensory Play
Follow our kids activities and ideas board on Pinterest for even more kids activity inspiration
Follow Anna – In The Playroom’s board kids Ideas and activities on Pinterest.
And don’t forget to pin this idea for later, or share with your friends on Facebook


These look so fantastic and colourful, and they sound so easy to make, I’ll definitely be having a go with this clay!
what a fun idea. my toddler would love this!